Blog · Getting started
Getting Started with Hoursbill: A 10-Minute Setup Guide
A blank invoicing app is not useful until it knows who you are, who your clients are, and how you want to get paid. This guide walks through the exact setup order that gets you from a fresh install to your first sent invoice in about ten minutes, with a screenshot of every screen along the way.
Step 0 — Install and open Hoursbill
Download the Windows installer, run it, and launch Hoursbill. On first open you land on the Dashboard — mostly empty, because nothing has been set up yet.
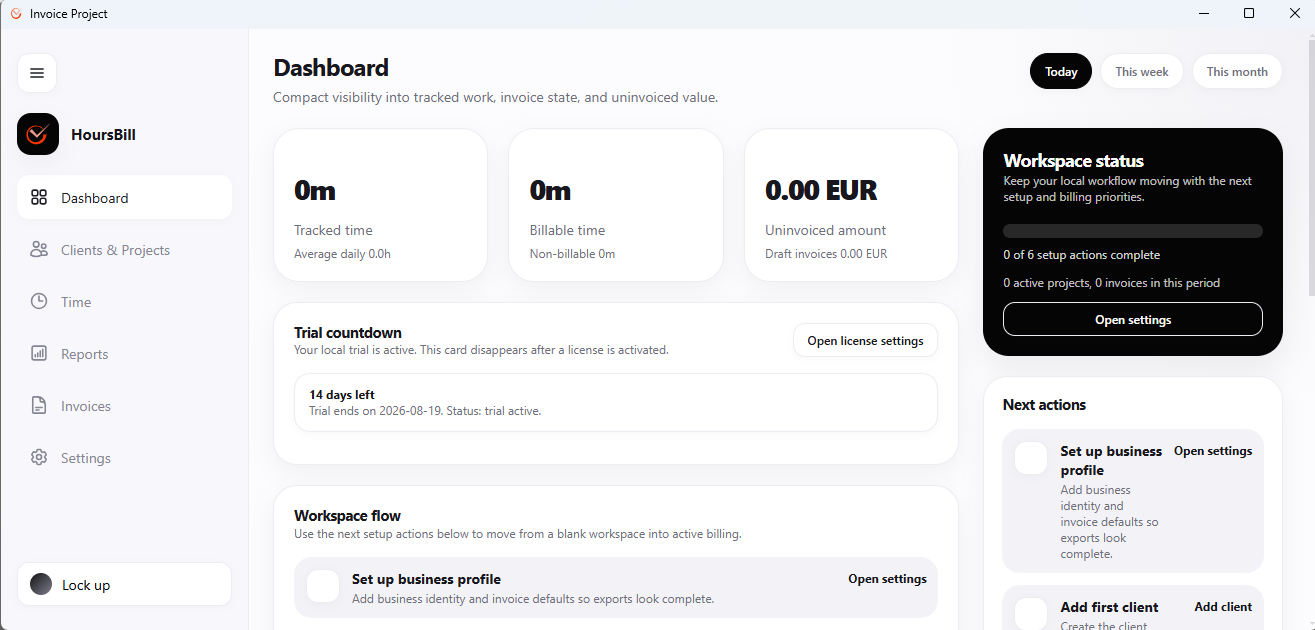
Notice the Workspace status card on the right and the Workspace flow checklist below the trial countdown — Hoursbill tracks your setup progress and always points at the next unfinished step. You do not have to guess the order; this guide follows it.
Step 1 — Set up your business profile
Click Open settings from the Dashboard, or go to Settings → Business Profile directly. This is the identity that appears on every invoice you send, so fill it in before creating anything else.
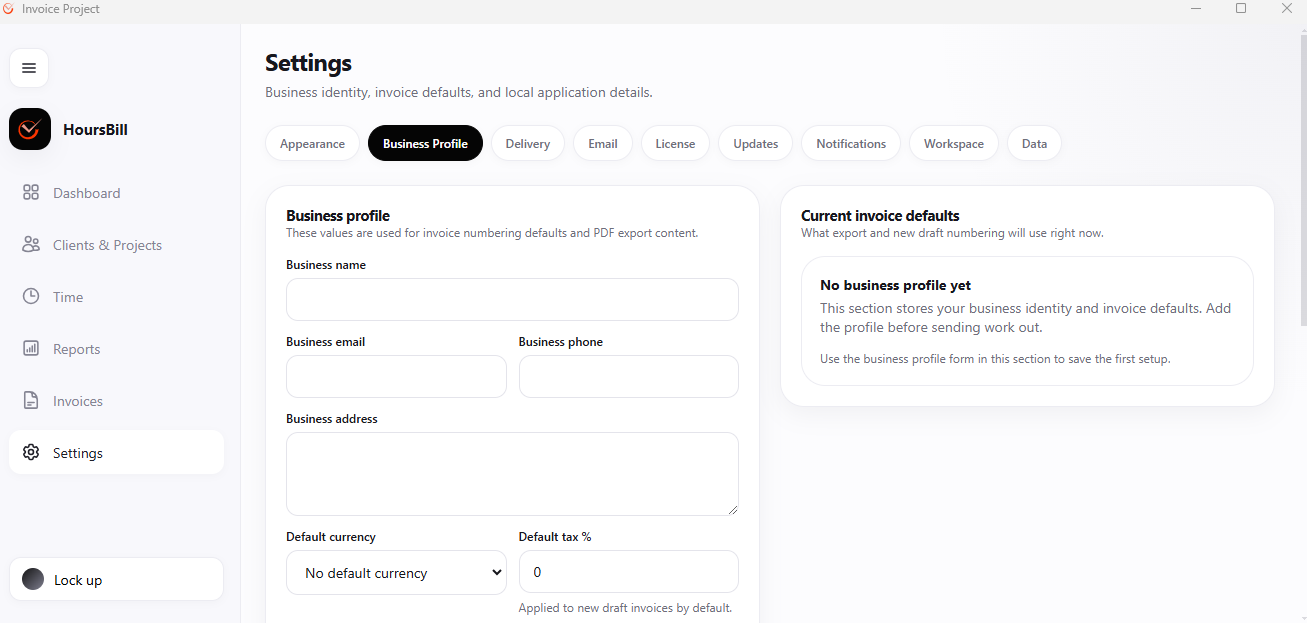
At minimum, fill in:
- Business name and address — required on invoices in most countries.
- Business email and phone — how clients reach you.
- Default currency — the one you bill most clients in.
- Default tax % — your standard VAT / GST rate, or 0 if not registered.
Step 2 — Adjust appearance (optional but quick)
Still in Settings, the Appearance tab controls the local interface — theme, density, and whether the sidebar starts collapsed. None of this affects invoices or data; it is purely how the app looks on your screen.
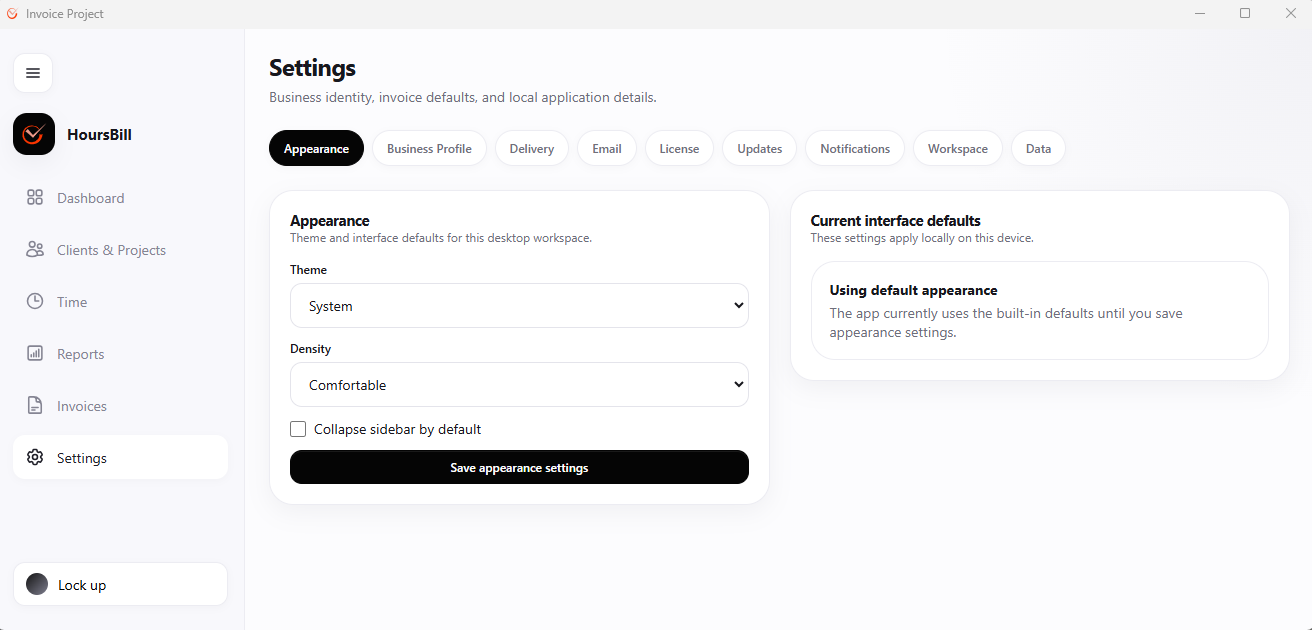
If you work on a smaller laptop screen, switching Density toCompact and enabling Collapse sidebar by default fits more of the Reports and Invoices tables on screen without scrolling.
Step 3 — Connect email (SMTP) or stay local-only
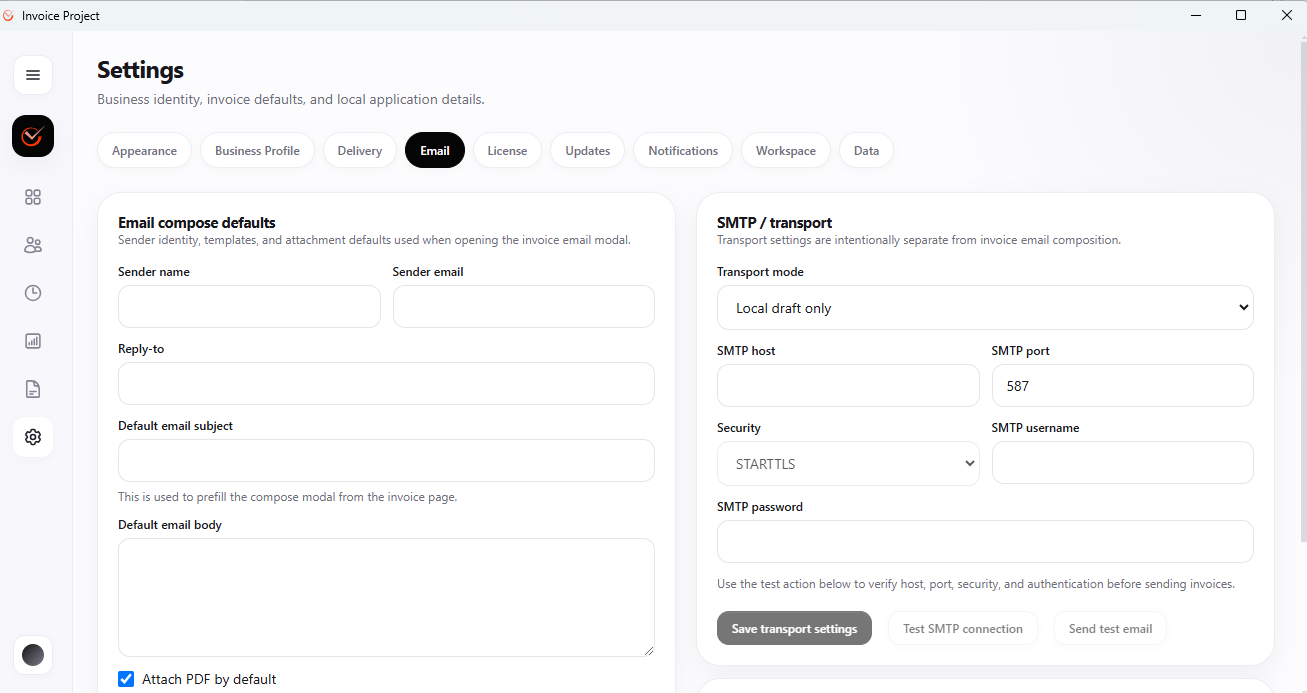
Open the Email tab. If you want Hoursbill to send invoices directly from your own address, configure SMTP here — see the fullSMTP setup guide for Gmail, Outlook, and custom domains. If you would rather export PDFs and attach them manually for now, leave Transport mode on Local draft only and come back to this later — nothing else in the setup depends on it.
Step 4 — Add your first client and project
Go to Clients & Projects in the sidebar. This is where every billing entity lives — clients, the projects under them, and any expenses you want to track against a project.
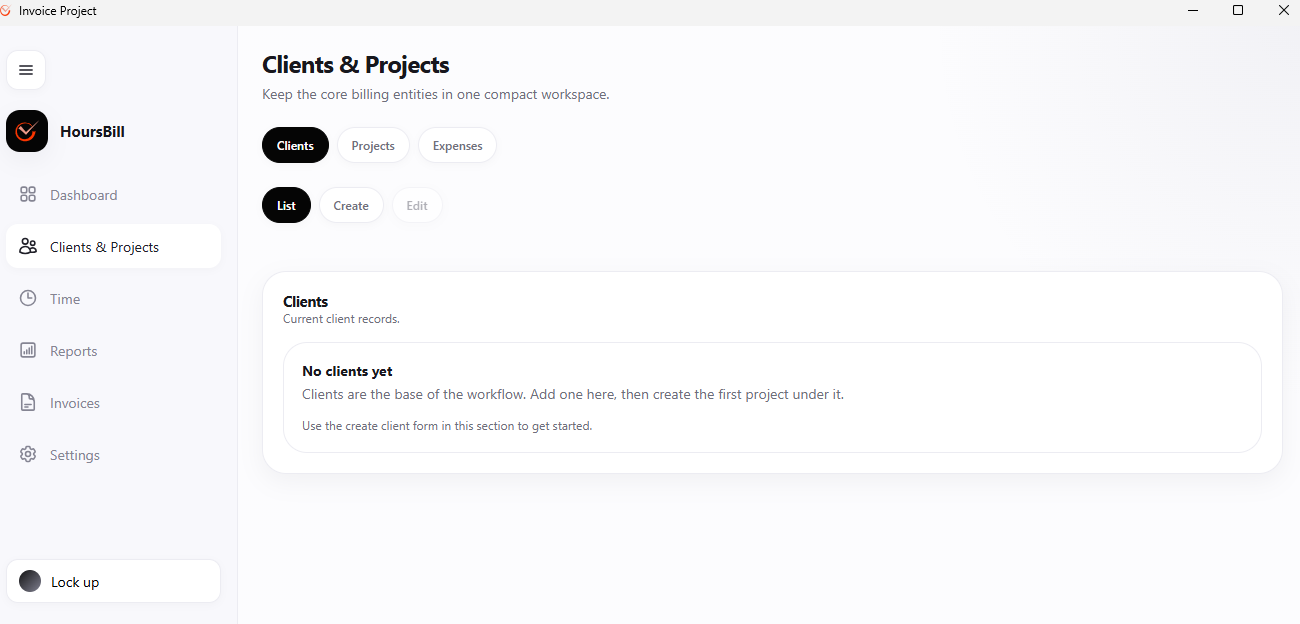
Click Create under the Clients tab, fill in the client's name and contact details, and save. Then switch to the Projects tab and create at least one project under that client — even a generic "General work" project is enough to start tracking time against it.
Step 5 — Track your first billable hour
Open Time from the sidebar. You can either start a live timer or add a manual entry for work already done.
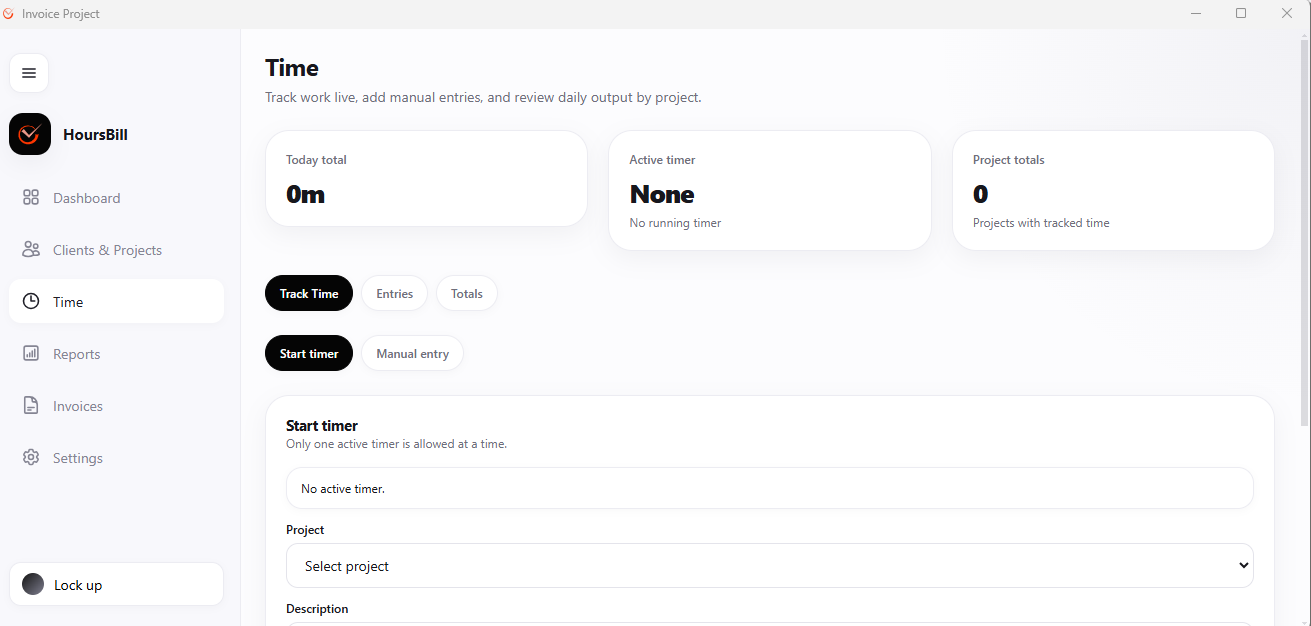
To start tracking:
- Select the Project from the dropdown.
- Add a short Description of the task (this becomes the invoice line item later).
- Click Start timer. Only one timer can run at a time — stop it before starting another.
- Prefer to log after the fact? Switch to Manual entry and fill in the date, start and end time.
Step 6 — Review your totals in Reports
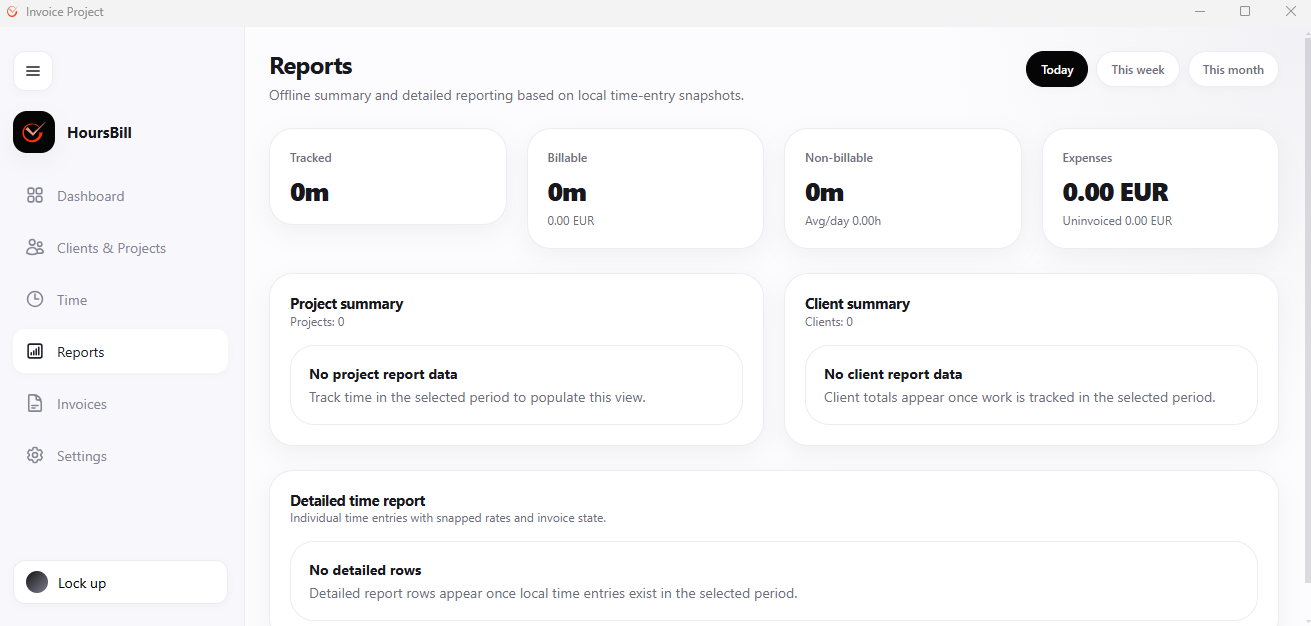
Once you have a few time entries logged, open Reports. This is your review layer before invoicing — a chance to catch a wrong project or a forgotten entry before it ends up on a client's bill.
Step 7 — Generate and send your first invoice
Open Invoices and click Create Draft. Pick the client and the date range you want to bill for — Hoursbill pulls in the matching billable time entries automatically, so there is no manual retyping.
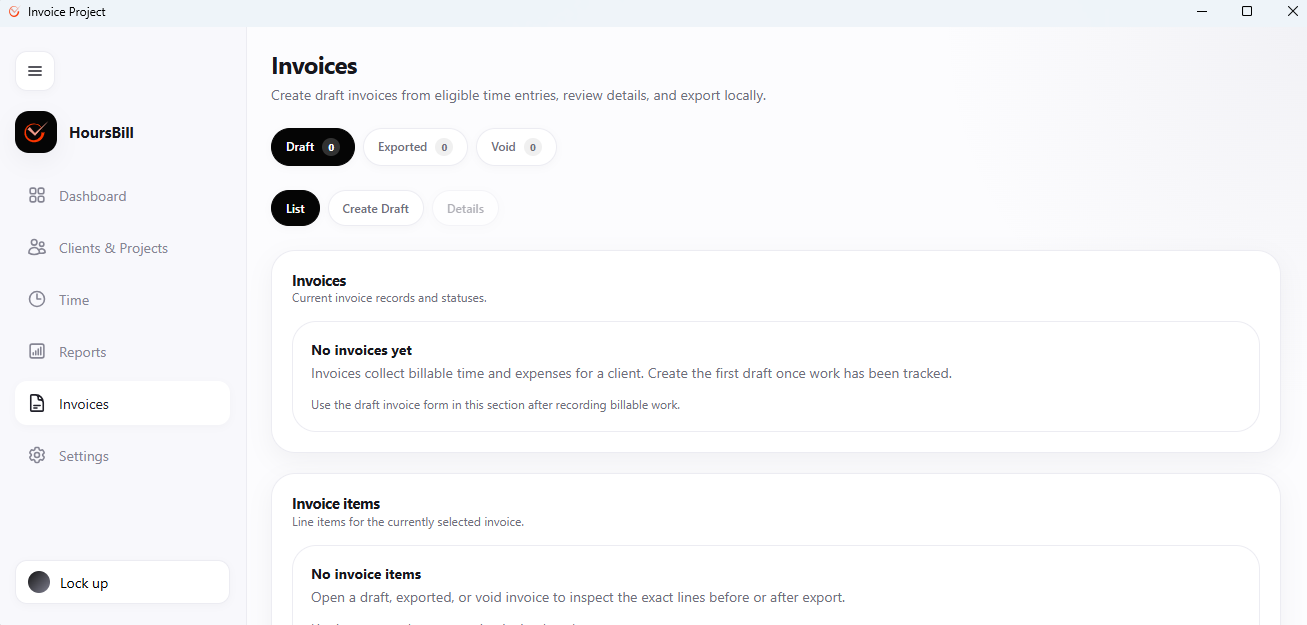
Review the draft, adjust line items if needed, then either export it as a PDF or — if you configured SMTP in step 3 — send it straight from the app. For the full breakdown of what a compliant invoice needs, seehow to write a professional invoice.
You're set up. What to check next
- Revisit Settings → License before your 14-day trial ends.
- Explore Settings → Notifications if you want reminders for overdue invoices.
- Check Settings → Data for backup and export options — since everything is stored locally, it is worth knowing where your data lives.
Frequently asked questions
How long does it take to set up Hoursbill?
About 10 minutes for the core setup: business profile, first client, first project, and either SMTP or local-draft email mode. You can start tracking time right after.
Do I need to create a client before I can track time?
Yes. Time entries and invoices are always tied to a client and, optionally, a project under that client.
Is my data synced to the cloud?
No. Hoursbill is a local desktop application — everything is stored on your own machine. That means faster performance and full control, but you are responsible for your own backups.
What happens when my 14-day trial ends?
The countdown is visible on the Dashboard. Once it expires, activate a licence from Settings → License to keep working. Your data is never deleted when a trial ends.
Can I import clients or time entries from another tool?
Check the Data tab under Settings for current import and export options. For a brand-new workspace, most freelancers find it faster to re-create active clients manually and start tracking fresh.
Set up your workspace in the next 10 minutes
Download Hoursbill, follow this guide step by step, and send your first invoice today — no monthly subscription, no cloud account required.